2022. 11. 3. 00:37ㆍBackend

1. DB 접속하기
DBeaver: 접속을 위해 필요한 도구(GUI) 중 하나
MySQL, Postgres 같은 DB 프로그램은 UI가 없는 텍스트 형태이다. DBeaver같은 데이터베이스 관리 프로그램을 사용하면 데이터를 좀 더 편하게 조회할 수 있다.
DB가 아니라 데이터베이스 관리 프로그램이다!!!
(DB 관리 프로그램에는 DBeaver, MySQL, webpack이 있다.)
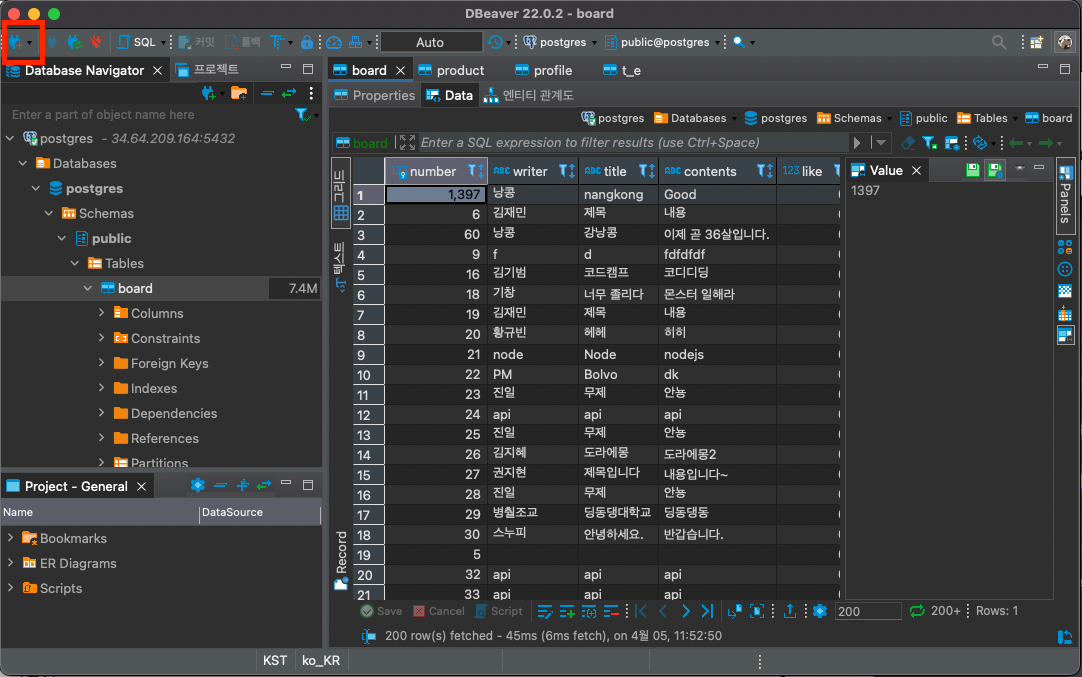
(1) [debeaver] 접속해서 설치 후 실행한다.
- MacOS for M1

(2) plugin 아이콘 클릭

(3) 사용할 DB를 선택한다.
- postgreSQL 선택
- 설치하라고 뜨면 설치 ㄱㄱ

(4) 포트번호와 컴퓨터 주소를 입력한다.
- HOST에는 백엔드의 주소를 입력한다.
- HOST: 34.64.124.189 , PORT: 5022, postgres0000

(5) Test Connection > 완료
- 끗: Data 확인

2. typeORM 설치
typeORM은 npm으로 설치한다.
npm으로 설치하려면 package.json이 있어야 한다.yarn init 명령어로 생성하면 되는데 어차피 typescript 설치하면 자동으로 생성된다.
(1) typescript 설치
yarn add typescript --dev
package.json 파일이 자동으로 생성된다.
(2) ORM(typeorm) 설치
yarn add typeorm
(3) pg 설치
- typeorm이 postgres와 연결하기 쉽게 도와주는 추가 라이브러리이다.
yarn add pg
(4) typescript를 실행하기 위한 tsconfig.json 생성 및 설정
(next.js환경에서는 yarn dev하면 자동으로 만들어지지만,
지금은 next.js 환경이 아니라서 직접 파일을 만들고 내용을 채워줘야한다.)
내용은 TS 사이트에서 추천하는 형식 참고 + experimentalDecoratorstsconfig.json
{
  "compilerOptions": {
    "target": "ES2015",
    "module": "commonjs",
    "strict": true,
    "esModuleInterop": true,
    "skipLibCheck": true,
    "forceConsistentCasingInFileNames": true,
    "experimentalDecorators": true
  },
  "$schema": "https://json.schemastore.org/tsconfig",
  "display": "Recommended"
}
(5) package.json 설정
- 타입스크립트를 노드로 실행시키는데 문제가 발생해서,
ts-node-dev index.ts를 추가했다. - ts-node-dev : 타입스크립트 전용 노드 실행기
package.json
    {
    "name": "class_backend",
    "version": "1.0.0",
    "main": "index.js",
    "license": "MIT",
    "scripts": {
      "dev": "ts-node-dev index.ts" // 타입스크립트 전용 노드 실행기
    },
    "devDependencies": {
      "typescript": "^4.6.3"
    },
    "dependencies": {
      "pg": "^8.7.3",
      "ts-node-dev": "^1.1.8",
      "typeorm": "^0.3.4"
    }
    }
(6) ⭐️.gitignore 생성⭐️
- 설치한 파일들이 불필요하게 git에 올라가지 않도록,
.gitignore파일을 만들고/node_modules를 넣어준다.
3. typeORM으로 Backend(JS)에서 DB 접속하기
Node.js에서 실행시키는 Javascript로 DB에 접속할 수 있다.
+ node.js로 실행시키는 방법
class_backend/index.ts
node.js를 사용하면 Javascript를 브라우저가 아닌 내 컴퓨터에서 실행시킬 수 있다.
(node.js: JS로 만들어진 소스코드를 실행시켜주는 실행기)node --version (아래처럼 버전이 나오면 설치가 되어있는 것)

node로 실행시키는 방법: node 파일명.ts

내용은 공식 문서를 참고해서 작성하면 된다. [typeorm Docs]
(1) 새 파일을 만들고 DB 정보를 입력한다.
DB와 연결하기 위해 DB 정보를 입력한다.class_backend/index.ts
import { DataSource } from "typeorm";
import { Board } from "./Board.postgres";

const AppDataSource = new DataSource({
  type: "postgres",
  host: "34.64.124.189",
  port: 5022,
  username: "postgres",
  password: "postgres2021",
  database: "postgres",
  entities: [Board],
  synchronize: true,
  logging: true,
});

AppDataSource.initialize()
  .then(() => {
    console.log("연결 성공!");
  })
.catch((error) => console.log(error, "연결 실패ㅜ"));- entities: 테이블을 만들어서 import해서 써줘야 한다.
[ ” ./*.postgres.ts “ ]로 작성하면 해당 위치의 postgres.ts로 끝나는 모든 파일을 연결해준다. - synchronize: 클래스와 DB를 동기화! entities에 있는 것이 DB에 만들어진다.
- logging: 명령어를 로그로 찍어준다.
(2) 테이블을 만들어줄 코드를 작성한다.
Board.postgres.ts
import { Column, Entity, PrimaryGeneratedColumn } from "typeorm";

@Entity()
export class Board extends BaseEntity { // Board 클래스를 테이블로 만들어줘!
  @PrimaryGeneratedColumn("increment")
  number!: number; // 타입스크립트의 타입

  @Column({ type: "text" })
  writer!: string;

  @Column({ type: "text" })
  title!: string;

  @Column({ type: "text" })
  contents!: string;
}- @: 데코레이터 함수, typeORM에게 테이블임을 알려준다.
- extends BaseEntity: 추가/삭제하는 기능을 포함한 데이터베이스 테이블이 된다.
{ type: "text" }: postgres database의 column타입을 넣어준다.
int, text ...- PrimaryGeneratedColumn("increment"): 중복되지 않는 자동으로 증가하는 컬럼
- PrimaryGeneratedColumn("uuid"): universial unique id(중복되지 않는 고유한 아이디가 자동으로 만들어진다.)
아래 오류가 발생하면 tsconfig.json에 설정을 추가한다.

"experimentalDecorators": true
(3) index.ts에 import!!!!
Board.postgres.ts를 index.ts의 entities 안에 import해서 넣어준다.
(4)index.ts 실행ㄱㄱ - 끗.
- 콘솔에 쿼리문이 출력된다.
- DBeaver에서 테이블이 생겼는지 확인(우클릭>새로고침)

실행 시키는 방법
package.json의 scripts에서 index.tsfmf ts-node로 실행시키는 명령어를 지정해두고yarn 지정한명령어로 실행하면 된다.

'Backend' 카테고리의 다른 글
| 검색 프로세스 : Inverted Index, Elastic Search, Redis (0) | 2023.02.09 |
|---|---|
| [Apollo Server] GraphQL API 만들기, 서버 연결하기 (1) | 2023.02.03 |
| Database의 종류 / ORM, ODM (0) | 2023.02.02 |